Showing posts with label Hybrid Project. Show all posts

Monday, June 20, 2011

Hybrid: Strawberry Notepad & Pen

A few weeks back I helped host a baby shower for a dear friend. I was in charge of games, so I decided to create a quick, easy, and inexpensive gift to use for the prizes.

I just LOVE Kristin's A Bushel and a Peck kit! The color palette is one of my favorites, and the papers are so unbelievably yummy!


This kit was the perfect choice for a sweet summer gift. I got the note pads in a package of 10 from an office supply store. I don't remember the exact cost, as they've been in my stash for a while now, but I know they weren't very expensive. The pen is a Pentel RSVP, but any pen that will allow you to remove the end and place a piece of paper inside will work.
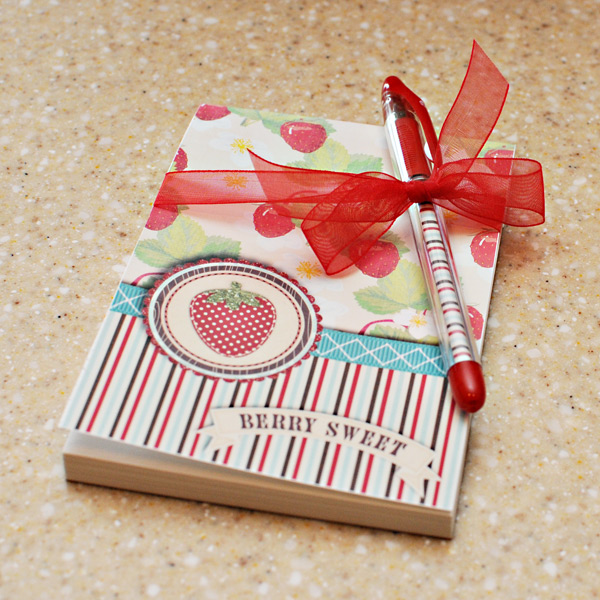


I measured my notepad and then created a canvas in Photoshop that was an inch longer than the front so I would have extra paper to wrap around the top and back part of the notepad. I added a few papers and then selected a few elements from the kit to embellish the front. I could have printed these out separately, but since I was pressed for time, I chose to add shadows instead to provide some visual dimension to
the front.


I measured the barrel of my pen and created a canvas that was 3/4" wide and the height of the barrel. I added a matching stripe paper to that canvas.

I printed everything out onto matte presentation paper and then cut the pieces down to size using a Fiskars paper trimmer. I removed the pen end, rolled up the strip of paper, and placed it inside the barrel. I replaced the end of the pen. I added a couple of strips of red line tape to the top and top back of the notepad, and then placed the red portion of the printed cover on top of the tape.

I picked out some red ribbon and tied it around as a way to attach the pen to the notepad for giving.

It was a very quick little project and took me about 15 minutes from design time to completion. It's a great little gift for anyone!

Tuesday, May 24, 2011

Teacher gifts~Ideas please!!

Hi there everyone!
 With the school year coming to end, i thought it would be fun to create a list of fun teacher gift ideas! My little girl will be graduating from playschool in June and will soon be beginning the next step in her life! Her playschool teacher is also moving away this year. She is very near and dear to us as she was also the first babysitter my children ever went to as I went back to work from my mat leaves. we will be giving her a few gifts and so far I have come up with only a few ideas, so ladies...help me out!!

Here is a little plant tag I made using Kristin's BEAUTIFUL kit In bloom:

which you can find here

Here is my project:


I look forward to hearing your ideas! Have a great week~Shannon

Sunday, January 23, 2011

Take a trip to Old Time Paris Romance!

Kristin has done it again. She has come out with a new quintessential romantic kit that is a must have in your stash. It's called J'Adore, and it is divine. Don't believe me?


From Kiki

Now, need a bit of extra romance this February? Here are an idea for a great craft project using this kit (courtesy of Lil Luna):

So if you haven't bought the kit yet, go get it. You know you need it!

Thursday, January 20, 2011

A warm hybrid gift idea

Hello KCB fans! Monique here with a quick and easy hybrid gift idea. Here's what I made:


By creating my own cup sleeve, adding it to a new paper cup and putting some hot cocoa mix in the cup - I now have a cute gift that perfect for almost anyone!

So here's what I had done tonight:
I already created a template by tracing a piece of paper over my cup. It would have been a lot easier if I could have gotten my hands on a premade one from a coffee house - but I can't. So I had to improvise. I then traced my template onto some pretty dotted brown paper from my local scrapbooking store. I glued it a few days ago and held it onto the cup with rubber bands so that it would stay together long enough to dry.

As you can see from the photo, I printed my label, tag and some extra decorations on a 4x6 mat photo (printed it at Walmart). Keeping your hybrid projects small and printable on a 4x6 image makes it pretty cheap.

Once the sleeve glue was dry, the label and tag were cut I finished it by gluing on the label (I like glue dots), punched a hole in the tag and tied it with ribbon to the cup rim.

Fill the cup with a cocoa powder pouch, maybe a baggy with some mini marshmallows and maybe even a chocolate dipped plastic spoon - and voila! You have a great (and super affordable) gift!

Here are a few close up photos:
   

I hope this inspires you to create some of your own gifts!

Here's the KCB kit I used to create the label and tag (minus the heart latte cup on the tag - that's credited to Kate Hadfield). I Love Cocoa.


Tuesday, November 16, 2010

Hybrid Tuesday~ Christmas frame

Good morning! I just wanted to share a quick and easy Christmas project with you all! Honestly it took me 20 minutes and cost very little! Here is the finished project:
And the supplies you will need:
~ frame from Micheals ($2.99)
~scissors
~mod podge or glue
~sand paper
~ pop up glue or cardboard
~digital kit (print out what you want to use!)

First thing I did was print out my background paper and elements that I wanted to use on the frame
Next I placed the frame face down on the face down paper and mod podged it in place! Next I sanded the edges of the frame and the interior to cut it off.

Then I simply cut out the cute little embellies and added them to the frame, if you want to add depth (like I did on the presents) just layer some cardboard underneath the element and glue in place! Voila, this took me 20 minutes and look how cute it turned out! For this cute little frame I used Kristins kit: From the Holiday Collection: Santa Baby
There you have it! If you give this easy little project a try, please link me to an image so I can leave you some love! Take Care!

Tuesday, October 12, 2010

Halloween treat bags!

Hi KCB fans! Monique here to share with you my Halloween treat bags for my daugher's class this year. They were quick to design and easy to assemble and look very nice. Here's what I made:
The first thing I did was to design the yellow label and the little tag. I then pasted as many as I needed onto a word document and printed them on my printer. You could also paste them onto a photo size document in your photo editing program and print that at your local photo developer's.

Then I took some black cardstock and cut them in half, scored and folded 1.5inches to create my packaging's "topper" portion. I used a Martha Stewart edge trimmer to pretty up the edge, then used just a bit of glue to keep the label strip in place.

Once the bags were filled (I used 5x7inch bags that I got really cheap on ebay ages ago), I lined up the edges of the bag inside the fold of the cardstock and stapled it in place. I then stapled on the To/From tag at the corner.

Once the labels and tags were designed and printed, the assembly probably took about 30 minutes for a dozen of these bags.

Here's a close up of the bag's edge (sorry for the blurry-ness of the photo):


Kit used is Kristin's Halloween kit from last year, one that's still a huge favourite among her CT:


**Pumpkin used in the To/From tag is from Lliella Designs' Little Tricksters kit. Also available at the Sweet Shoppe.**

Wednesday, August 18, 2010

Back to school!

Hi There! Shannon bringing you a late night Hybrid post! Nothing like running out of ink, mid-project...living in a small town and having to rush to the nearest city to get more, LOL! But here I am tonight ready to post! :)
 So here is the reality...summer here is pretty much over, the temperatures are falling, the rain has set in again and it's mid August..sigh..which means that school is about to start up again! For us here, my little girl will be starting playschool, her last year before she starts kindergarten next fall which means this year there will be more projects coming home, more field trips and a preschool grad...*insert tears here* For my hybrid project today I decided to make Jade her very own personalized crayon box! I used Kristin's kit ~Bookworm~ which is SUPER cute, and if you don't already have it, definitely grab it!

And here is the kit!

Hope you have a great night!

Thursday, July 15, 2010

Scrapping for the kitchen!

Hey KCB fans,

I wanted to share with you this week something that I made that really helps keep me organized with mealtime. I made it a while ago using a now retired (sorry) Cozy Kitchen by Kristin.

On the left you can see that I have the days of the week printed - this is for my meal planning. Then on the right is a space for writing things that we need to buy... then when I'm making my grocery list I can refer to that for things that we've run out of. Having this kitchen helper has really made dinnertime a lot easier. I can see a few days in advance what the meal plan is and take meat out of the freezer ahead of time. And the list side really keeps me from forgetting things that I don't usually buy but may need.

Now to make this all I did was scrap my image at 8x10 and printed at my local photo printer. Then I laminated it (later on I glued magnets to the back for sticking to the fridge) and it's done! Find yourself a fine tip dry erase marker and you're ready to organize your meal planning and shopping!

So why don't you pick out a fun kit from your stash and scrap yourself a kitchen helper too? It'll also reduce how often the hubby and kids ask what's for dinner since they can just read it for themselves :-)

Thursday, June 10, 2010

A Hybrid Summer Adventure album


This summer, why not have a mini album handy for recording some of your favourite mini adventures? This week I made myself a little mini album with room for me to record 5 of this summer's little adventures (feel free to make yours larger if you'd like!). It didn't take me long at all to put it together, the longest amount of time spent on it was definitely the designing part.

So here's what I designed:

2 pocket designs to alternate in the album
1 tag design
Front cover and back cover.
I printed the covers on photo paper with a mat finish at Walmart, the other parts I printed at home on my home printer using brochure paper (also with a mat finish). Here's what one of my ready to print pages looks like, I also threw on some elements to use to decorate the album pages.
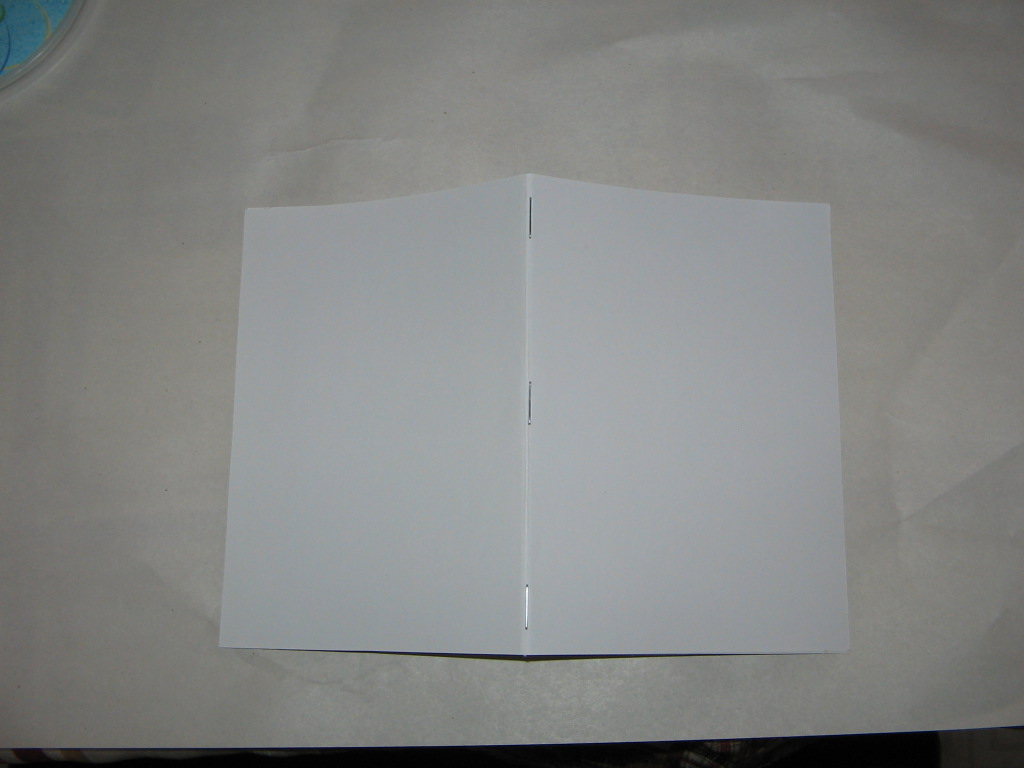
Now for the album! I used 3 pieces of cardstock paper measuring 5.5x8 inches (2 8.5x11" sheets trimmed down), stacked them... folded in half... then stapled on the crease. This is what that looked like:
Then I glued on the covers, cut out the pockets, tags and elements and started assembling! Here are the tags and pockets all cut out, then I folded and glued the pockets.
Then I started glueing stuff onto the album! I've already filled out one set of pages by adding a photo of the day we took our daughter to a local park to fly a kit. I filled out the tag with info about the day and wrote the date and place on the pocket. The rest of the book will get filled out thoughout the summer as we do some fun local stuff.


Well that's it for this hybrid project! Want to know what cute kit I used for this? Then check out Going Places by Kristin!

Tuesday, May 11, 2010

An easy hybrid gift packaging!

Hey all you KCB fans!

I have another hybrid project to show you! Now I made this for Mother's Day, but you can make something like this for any occasion!

Here's what I made:

The card was easy - design on 3x3 document, print and glue onto a 3x3 blank card base from Close To My Heart (one of those home party scrapbooking companies). And I added a ribbon along the folded edge.

The packaging was easy too! I used an envelope, measured the flap, designed and printed a new - prettier flap. I glued on the new flap, as well as a scalloped decoration. I used velcro circles for the closure and glued a piece of ribbon under the flap... and now I have an envelope sized purse perfect for some chocolates.

Go ahead, try making one for someone's birthday, a get well gift, a new baby etc... the ideas are endless!

And what kit did I use? A Mother's Love by Kristin and Susan Bartolini!

Thursday, April 22, 2010

A Hybrid Garden Journal!

Happy Earth Day everyone!!

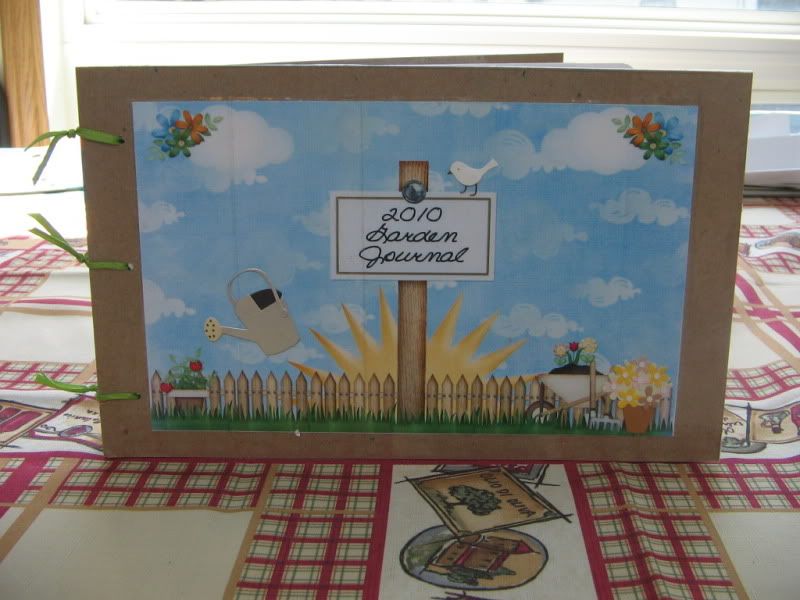
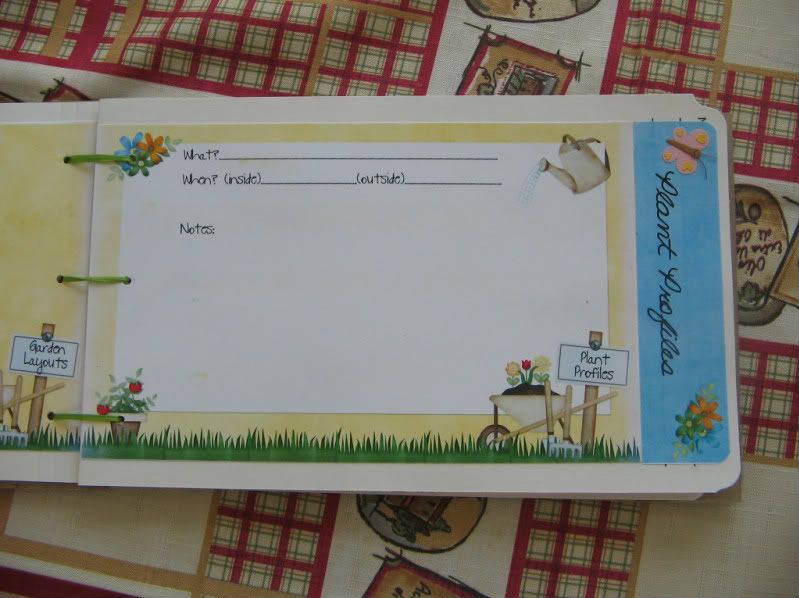
I'm here today to share with you my latest hybrid creation - a garden journal! We bought a house last year, late spring and I left everything alone while I waited to see what plants were already here. This year I'm planting tons of new flowers, making a small veggy garden, starting a herb garden.... lots of new things that I want to record my progress with. So I made a journal with everything I wanted it to have in it. Here's what my finished Garden Journal looks like:


So the first thing I did was figure out what I wanted in my journal (garden layouts, plant info and project ideas), how many pages for each category (just a few for some, and lots for others!), and what I would use as my album base. I chose to use old file folders as my base. I then had to figure out the sizes of the individual pages once I cut the folders in half. Then I was able to design the pages in PSP (my program of choice) and print the pages out on my home printer. Once printed I was ready to assemble!

I gathered supplies and tools:

  • Printed pages, covers and labels
  • 3 file folders
  • ribbon, glue, scissors, paper cutter, hole punch, corner punch, packing tape (for "laminating covers) I also added some stickers that my DD bought me a year ago but I hadn't used yet!

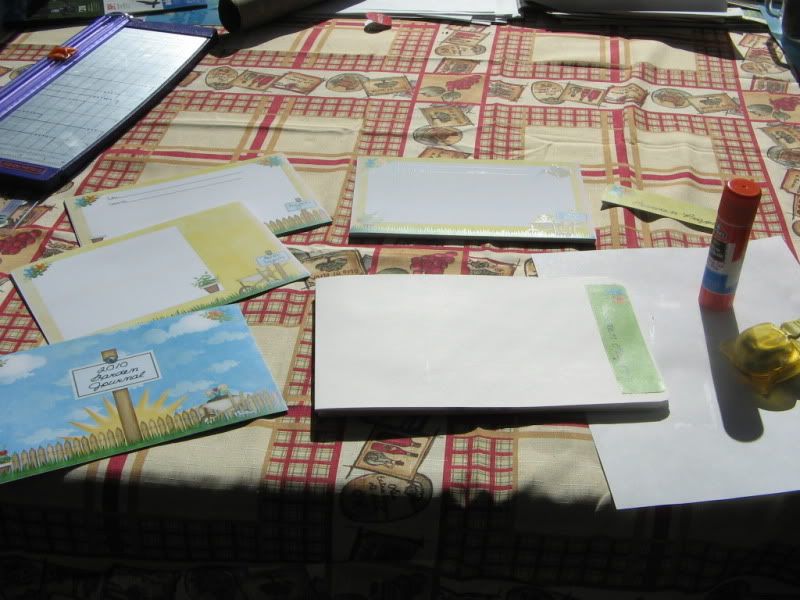
Then I started cutting out the pages (I printed 2 per sheet) and cut the file folders in half. Each file folder piece gave me 4 pages in my journal. Here's everything cut out and ready to assemble:

(sorry for the poor quality photos, the sun was my nemesis all morning!)

I glued on the labels and started glueing the pages onto the file folder "pages". The sun was so hot at my kitchen table this morning, the glue was drying before I could get it onto the pages... lol (I was using a glue stick). But eventually I got all the pages glued on.

Next I glued the covers to some cardboard sheets I had saved from some packaging (I always save the flat, sturdy ones just for this kind of thing). I also used the packing tape at this time to protect the covers, at this rate I think I really need to invest in a laminator - I use packing tape for this so much that I store it with my crafting supplies.... LOL!

Then I used my Crop-a-dile (though you can use any hole punch) and punched holes in the covers and folders so that I could thread a piece of ribbon to bind it all. I kept the ribbon a bit loose when I tied it so that the pages of the journal can lay flat when open.

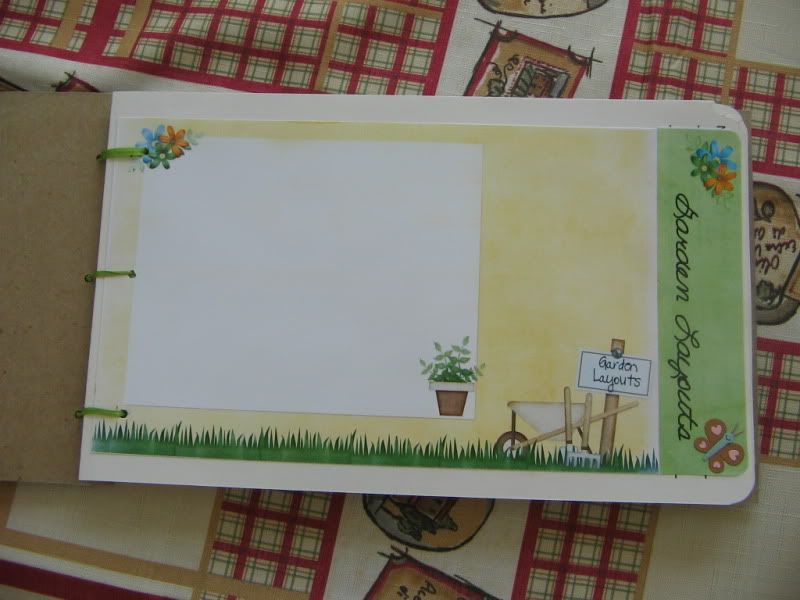
Here are the different page types I have in my Garden Journal:
 

And that is it! I bet you are wondering what KCB kit I used - well.... here it is:

It is called... My Happy Garden and is hidding in the Penny Candy section of the Sweet Shoppe - that means you can get it at 30% off!

So that is it for me today! Next time you are wanting to make an album or journal - see what materials you might already have on hand... it will keep the costs down, and use up some stuff you probably have just lying around... lol.

Have a happy scrappy day KCB fans!

Friday, March 5, 2010

Hybrid notebook how-to

Hello KCB fans! Monique here shaking things up with a hybrid post for you this week! I loooove hybrid. So since I got my ink refilled in my printer today I thought I'd whip something up for you!

So the first thing I did was measure the notebook I wanted to cover and create a document in PSP (my scrapping program of choice) to start the digital portion. Here's what that looked like (I added lines to show where the spine is, right side is front - left side is back):


Then I started scrapping :-)


Saved it as a jpg image, then inserted it into a word document.


When inserting into a word document, make sure it hasn't resized to fit. Play around with margin sizes, rotation of paper and image, and make sure the image settings are set to have it shown at original size.

Then print and gather supplies!


Now for the fun part! Cut out the notebook cover (as you can see mine's just a tiny thing). Glue it on (yes I like to use my DD's good old fashioned glue stick!). Add embelishments (I added a flower and a gem to the flower's center). And you're done!
(Before adding the flower, I used packing tape to "laminate" it so it can take the abuse of being carried around in my purse).

Digital Credits:

Kit used is called Frog Prince by KCB, found in the SSD Quarterly Assortment 2009 Version 3;
Pencil from KCB's Family Fun collab kit;
Doodles from Christy Lyle's Bonus Sipral book;
Font used is called DJB JACKED UP KINDA LUV

I think from start to finish this thing took me about 30 minutes. It's quick, it's easy, it's cute... what more can you ask for?!
Friday, December 18, 2009

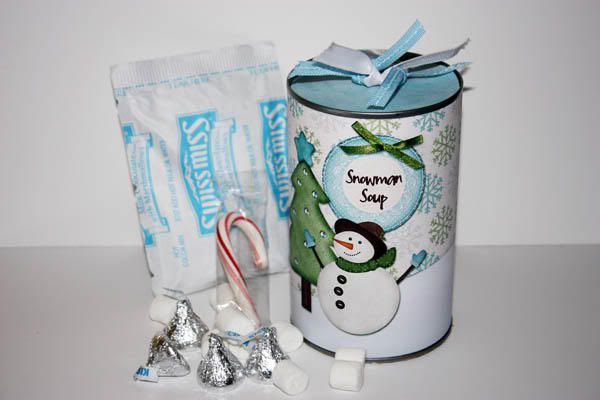
Hybrid Project - Snowman Soup

I want to thank Deb (dbrprc) for creating this tutorial for you all to enjoy. It is adorable beyond belief, and I have issues with glue so I needed some help. hehehee


Pop-top can tutorial by Deb Pierce (dbrprc)

Supplies:
Pop-top can
Safety can opener
Printed designs
Pencil
Scissors
½ circle punch (or use scissors)
Strong adhesive (I used Tombow Mono Multi liquid glue)
Hot glue gun

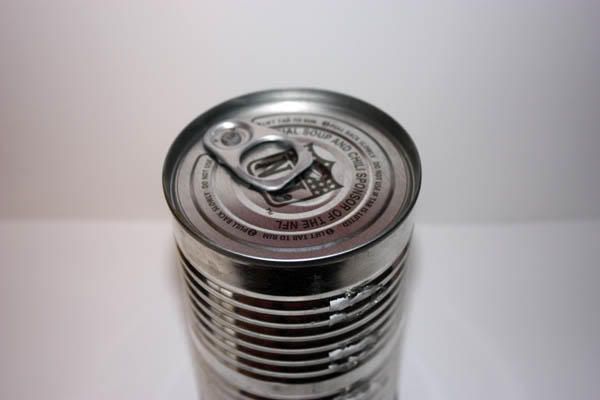
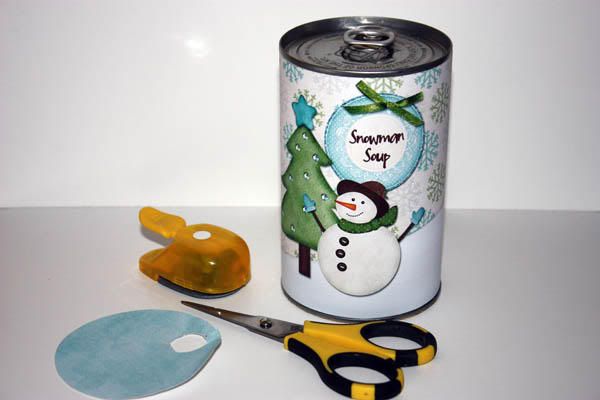
For this project you will need a pop-top can like the ones some soups and fruits come in. It can be any size you want. I happened to use a soup can.

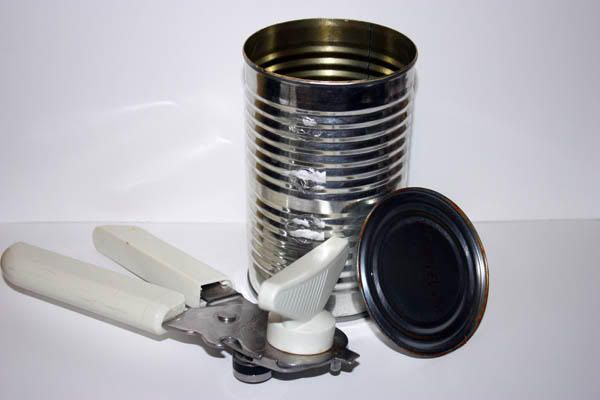
Turn the can over, and remove the bottom with a safety can opener (the kind that turns the edge in so it isn’t sharp). Leave the top of the can intact. Empty out the can and wash thoroughly.

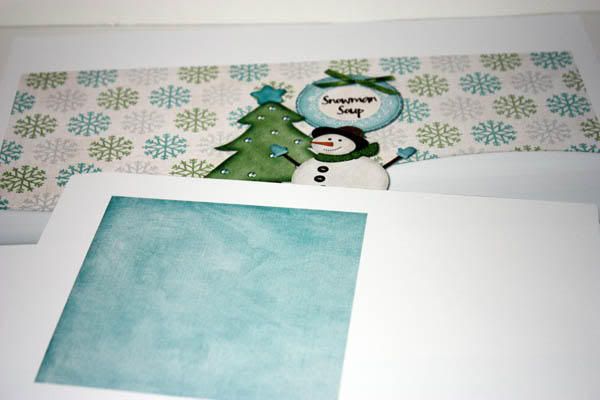
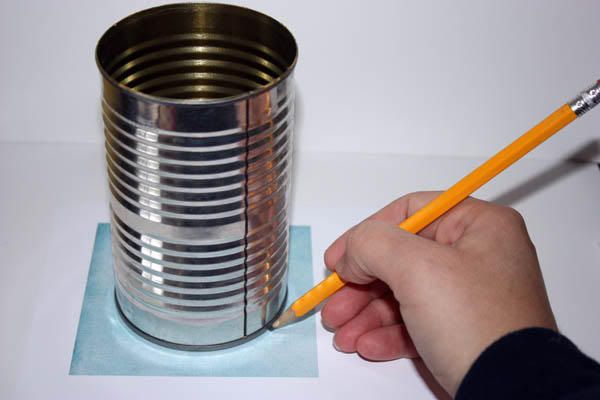
Create and print the designs you want to decorate the can. For my project I created a panel that was 10 inches wide by 5 inches high, but this will depend on the size of the can you are using. I also printed a 4 inch square for the top of the can. Next, trace around the top of the can onto the 4 inch square piece, and cut just inside the line. You may have to trim just a little, until it fits well on the top of the can.

Now comes the tricky part… trimming around the tab on the lid. I did this by trial and error. First I marked where the tab would be on the paper, then used a circle punch (mine was ½ inch) to punch a hole in the paper at that point. Then I cut a slit from the edge of the paper to the circle. I tested the fit around the tab, then trimmed as needed until it fit.

Now you can glue your designs on the can. For the main panel, you need to use strong adhesive so it will stay in place. I used Tombow Mono Multi liquid glue but you can also use red line tape or another strong adhesive. Once you have adhered the designs to the can, add some ribbon to the tab for a finishing touch.

Then all you have to do is fill the can with some candy or other small gift and glue the bottom in place. I used hot glue for the bottom.

Now you have a sweet little gift for someone you care about. I hope you give it a try, it really isn’t hard! Have fun!